

Ceramics Identification Checklist: A Collector's Guide
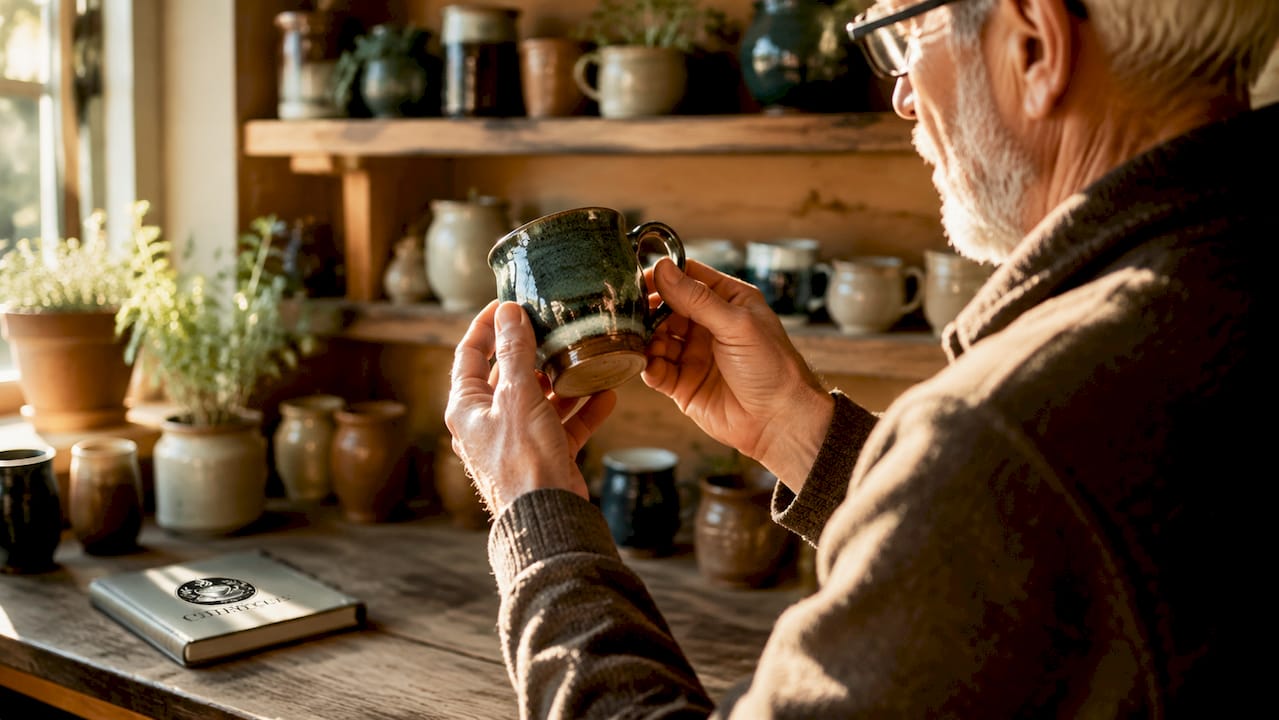
A ceramics identification checklist is a systematic method for distinguishing ceramic types, validating authenticity, and estimating age through physical markers, maker’s marks, and material characteristics. Collectors and enthusiasts rely on this structured approach because misidentifying the clay body first undermines every subsequent step, from reading marks to assessing value. The formal term used by appraisers and conservators is “ceramic assessment,” but the checklist format makes that process practical for everyday collectors. This guide walks you through each step, from body type to provenance, so you can evaluate any piece with confidence.
1. How to use a ceramics identification checklist
The ceramics identification checklist works as a sequential process, not a pick-and-choose list. Each step builds on the previous one. Skipping body type identification and jumping straight to marks is the single most common error collectors make. Getting the sequence right separates confident collectors from frustrated ones.
Start with the physical object in hand. Before consulting any reference book or database, examine the piece under natural light. Note its weight, translucency, and surface texture. These observations anchor every decision that follows.
2. Identifying ceramic body types: earthenware, stoneware, and porcelain
The clay body is the foundation of any ceramic identification guide. Ceramic bodies are classified by firing temperature and physical properties: earthenware is porous and fired at 1,000–1,150°C, stoneware is denser and partially vitrified, and porcelain is translucent when light passes through thin sections. Knowing which body type you hold determines which marks, glazes, and decorative styles are even plausible.
| Body Type | Firing Temp | Porosity | Translucency | Typical Marks |
|---|---|---|---|---|
| Earthenware | 1,000–1,150°C | High | None | Impressed, painted underglaze |
| Stoneware | 1,200–1,300°C | Low | None | Impressed, salt glaze stamps |
| Porcelain | 1,260–1,400°C | Very low | Yes (thin sections) | Underglaze blue, overglaze enamel |
The sound test is one of the most reliable field methods. Tap the piece gently with your fingernail. Earthenware produces a dull thud. Stoneware gives a slightly higher ring. Porcelain rings clearly, almost like a bell. This test takes three seconds and costs nothing.
For porcelain identification, hold the piece up to a focused light source. Thin porcelain walls show a warm glow. Earthenware and stoneware remain opaque regardless of light intensity.
Pro Tip: Use a small LED penlight rather than overhead lighting for the translucency test. The focused beam reveals subtle differences that ambient light misses entirely.
3. Decoding maker’s marks and registration symbols to date ceramics
Maker’s marks are the most searched element in any ceramics marking guide, but they are only one clue in a multi-step process. A famous-looking mark alone is insufficient for authentication. Authentic identification requires mark reading, material behavior testing, wear assessment, and provenance evaluation working together.
Marks appear in five main formats:
- Impressed marks: Pressed into wet clay before firing. Look for slight clay displacement at the edges, which confirms the mark is original.
- Incised marks: Scratched into leather-hard clay. Lines are irregular and show tool drag.
- Underglaze painted marks: Applied before the glaze coat. The mark sits beneath the glaze surface and shows the same wear as the surrounding glaze.
- Overglaze printed marks: Applied after firing. These sit on top of the glaze and can wear off with use.
- Decal marks: Transfer-printed designs, common after the mid-19th century. Edges are sharp and uniform under magnification.
British earthenware from 1842 to 1883 often carries a registration diamond mark encoding the design registration date. Pieces made after 1891 feature “England” or “Made in England” due to U.S. import tariff regulations that required country-of-origin labeling. These two date anchors alone can narrow a piece’s production window by decades.
Authentic impressed marks show clay displacement and wear consistent with the surrounding glaze. Fake marks often look isolated and unnaturally shiny, with no clay movement at the edges. Photograph marks under raking light at a 45-degree angle to reveal these details clearly.
Numbers on a ceramic base are frequently mold codes, pattern identifiers, or decorator numbers rather than production dates. Cross-reference any number with a pattern catalog before treating it as a date. This single mistake causes more misattributions than any other error in ceramic type identification.
Pro Tip: Photograph every mark before cleaning the piece. Cleaning can remove residue that makes faint marks visible. A photo taken before cleaning often captures details you cannot recover afterward.
4. Evaluating glaze, decoration, and surface characteristics
Glaze tells you as much about a piece as its marks do. The texture, color, and sheen of a glaze vary by ceramic type, production period, and regional tradition. A collector who reads glaze well can date and place a piece even when no marks are present.
Even unmarked pieces can be identified through glaze behavior, construction details like foot rings, and translucency tests with focused lighting at different angles. Angled photography reveals subtle inscriptions or glaze nuances that straight-on shots miss entirely.
Use this sequence when inspecting glaze and decoration:
- Check glaze coverage at the foot ring. Antique pieces often show deliberate unglazed areas or glaze pooling at the base. Machine-made modern pieces have consistent, thin glaze application.
- Look for crazing. Fine networks of cracks in the glaze surface indicate age and thermal cycling over time. Artificial crazing exists but tends to be too uniform.
- Assess color depth. Hand-painted decoration shows brush variation and slight color inconsistency. Transfer-printed decoration is uniform and sharp-edged.
- Inspect for repairs under UV light. Restored areas fluoresce differently from original glaze under ultraviolet light. A UV flashlight is a standard tool in any serious ceramic object checklist.
- Note decorative motifs. Chinoiserie patterns, willow designs, and botanical studies each correspond to specific production periods and regional traditions.
Artificial aging is a real concern with high-value pieces. Surface repairs often show as slight color mismatches or texture changes visible under angled lighting. Run your fingertip lightly across the surface. Repaired areas sometimes feel slightly raised or smoother than the surrounding glaze.
Avoid cleaning a piece before completing your full assessment. Cleaning removes patina, residue, and sometimes original decoration. Identify first, clean second.
5. Using condition, wear patterns, and provenance for authentication
Condition assessment is the final filter in any ceramics assessment checklist. Consistent wear patterns validate age. Asymmetrical wear or suspiciously fresh repairs raise authenticity questions that marks and glaze alone cannot resolve.
| Condition Issue | Impact on Value | Assessment Tip |
|---|---|---|
| Hairline crack | Moderate reduction | Check under strong light; run fingertip across surface |
| Chip or flake | Significant reduction | Photograph before and after any cleaning |
| Glaze lifting | High reduction | Indicates moisture ingress; check foot ring area |
| Professional restoration | Variable | UV light reveals repaired areas |
| Original wear at foot | Positive indicator | Consistent wear confirms age and use |
Provenance documentation supports every other finding. A piece with a verifiable auction record, estate inventory, or exhibition history carries stronger authenticity evidence than physical markers alone. Document what you know and note what you cannot verify.
Photograph each piece from at least six angles before any cleaning or handling: the overall form, the base, the foot ring, the glaze surface, any maker’s marks, and any damage points. This photographic record becomes part of the piece’s permanent documentation and supports future appraisal or sale.
6. Best practices for documenting and caring for ceramics during identification
Proper documentation and care protect a piece’s value and your ability to identify it accurately. Photographing six angles including the base, foot, glaze, marks, and damage points before valuation is the professional standard. Cleaning should use pH-neutral soap and distilled water to avoid surface damage.
Dos and don’ts for handling, cleaning, and storage:
- Do photograph all marks and damage before any cleaning.
- Do use pH-neutral soap and distilled water for cleaning.
- Do store pieces individually wrapped in acid-free tissue.
- Do handle pieces with clean, dry hands or cotton gloves.
- Don’t use bleach, citrus-based cleaners, or abrasive scrubs on any ceramic surface.
- Don’t expose ceramics to sudden temperature changes. Thermal shock can crack even dense stoneware bodies.
- Don’t stack pieces directly on top of each other without padding.
- Don’t soak pieces with unglazed areas, as porous clay absorbs water and can crack during drying.
Collectors often store handmade ceramics and rarely use them, but continued gentle use and careful cleaning actually support long-term preservation. Regular handling lets you monitor condition changes before they become serious damage. For pieces you display rather than use, check for dust accumulation and humidity changes seasonally.
For guidance on presenting your collection effectively, Thegildedcup’s resource on displaying fine ceramics covers storage and display methods that protect condition while showcasing pieces well.
Key Takeaways
Accurate ceramic identification requires a sequential checklist that begins with clay body type and builds through marks, glaze, condition, and provenance before any conclusion is drawn.
| Point | Details |
|---|---|
| Start with clay body type | Identify earthenware, stoneware, or porcelain first; all mark analysis depends on this step. |
| Read marks in context | Check wear, clay displacement, and glaze consistency to distinguish authentic marks from fakes. |
| Use date anchors | British registration diamonds (1842–1883) and post-1891 country marks narrow production windows reliably. |
| Inspect glaze and surface | Angled lighting and UV light reveal repairs, crazing, and construction details marks cannot show. |
| Document before you clean | Photograph six angles and all marks before any cleaning to preserve evidence for appraisal. |
Why I always start with the clay body, not the mark
Most collectors I talk to do the same thing when they pick up an unfamiliar piece. They flip it over and look at the base first. The mark is magnetic. It feels like the answer. I spent years doing exactly that, and it cost me more than a few misattributions.
The mark is a label. The clay body is the truth. A piece of earthenware cannot carry a porcelain manufacturer’s mark and be genuine. When you identify the body type first, you immediately eliminate a large category of possible fakes and misattributions before you even look at the stamp. That single habit change is worth more than any reference book.
The other mistake I see constantly is treating numbers on the base as dates. A four-digit number feels like a year. It almost never is. Cross-referencing with a pattern catalog takes ten minutes and prevents a conclusion that could be embarrassingly wrong.
The checklist approach works because it forces patience. You cannot skip to condition assessment without knowing the body type. You cannot interpret a mark without understanding what marks are even plausible for that body type and period. Sequential evaluation is not bureaucratic. It is how you build a conclusion that holds up under scrutiny.
For collectors interested in limited edition ceramics, the same checklist applies with one addition: verify edition numbering against documented production records, not just the mark on the base.
The identification process is genuinely enjoyable once you stop treating it as a test you might fail. Every piece is a puzzle with physical evidence built into the clay, the glaze, and the marks. The checklist just gives you a reliable order in which to read that evidence.
— Sharbel
Thegildedcup resources for ceramic collectors
Collectors who want to go deeper on ceramic identification will find Thegildedcup’s curated selection and editorial content a practical starting point. The site covers fine porcelain characteristics in detail, helping you apply body-type identification skills directly to pieces you are considering for your collection.

Thegildedcup brings together high-quality ceramics, expert editorial guides, and a curated shop built for collectors who take authenticity seriously. Whether you are refining your identification skills or looking for a verified piece to add to your collection, the platform offers both the knowledge and the selection to support that process. Visit Thegildedcup to browse the full range of ceramics and drinkware available.
FAQ
What is the first step in identifying ceramics?
The first step is identifying the clay body type: earthenware, stoneware, or porcelain. All mark analysis depends on correctly identifying the body first.
How do I tell if a maker’s mark is authentic?
Authentic marks show clay displacement at the edges and wear consistent with the surrounding glaze. Fake marks often appear isolated and unnaturally shiny under magnification.
What do numbers on the base of a ceramic piece mean?
Numbers on a ceramic base are usually mold codes, pattern identifiers, or decorator numbers rather than production dates. Cross-reference any number with a pattern catalog before drawing conclusions.
How can I identify ceramics with no maker’s mark?
Unmarked pieces can be identified through glaze behavior, foot ring construction, translucency testing, and angled photography to reveal subtle surface details.
What cleaning method is safe for antique ceramics?
Use pH-neutral soap and distilled water for cleaning. Avoid bleach, citrus-based cleaners, and abrasive scrubs, and always photograph the piece fully before any cleaning begins.